> For the complete documentation index, see [llms.txt](https://wifi-hacking.cavementech.com/llms.txt). Markdown versions of documentation pages are available by appending `.md` to page URLs; this page is available as [Markdown](https://wifi-hacking.cavementech.com/wifi-hacking-basics.md).
# WIFI Hacking Basics
### Setup Environment
**Kill Processes:** Stops services like Network Manager that interfere with wireless tools.
```
mkdir ~/exam && cd ~/exam
sudo airmon-ng check kill
```
### Check if your device supports monitor mode
```
iw list
```
### **Start Monitor Mode**
Puts the wireless card into a mode where it can capture all traffic, not just traffic meant for your machine.
```
sudo airmon-ng start wlan0
```
or
```
ifconfig down
iwconfig mode monitor OR iw set type monitor
ifconfig up
```
**Verify Mode**: Ensure the interface (usually renamed to `wlan0mon`) is in monitor mode.
```
iwconfig | grep wlan
```
or
```
iw dev
```
### Virtualized Environment
(If you don't have a physical wifi card and are emulating wifi adapters)
You can utilize the mac80211\_hwsim kernel module, which acts as a software simulator for 802.11 radios. This allows you to perform complex Wi-Fi attacks within a virtual environment without requiring multiple physical USB Wi-Fi adapters.
#### 1. Initializing the Virtual Radios
The first step is to load the module into the Linux kernel and specify how many virtual "cards" you want to create.
```
modprobe mac80211_hwsim radios=4
```
* Purpose: This creates four distinct wireless interfaces that the operating system treats as physical hardware.
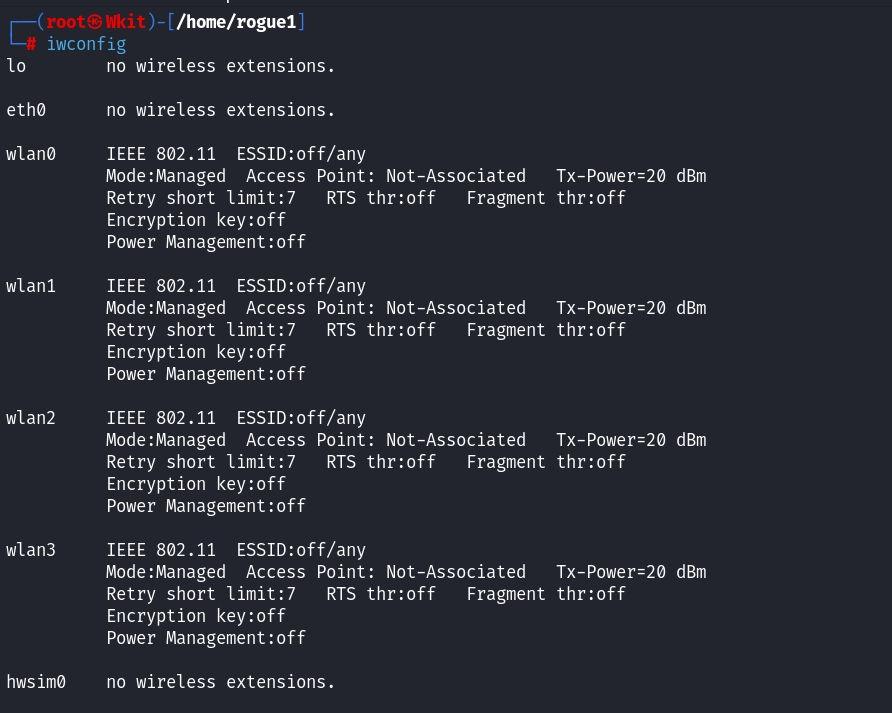
* Verification: Running `iwconfig` or `iw dev` will now show interfaces named `wlan0`, `wlan1`, `wlan2`, and `wlan3`
#### 2. Identifying the Interfaces
Once initialised, you need to identify which virtual radio corresponds to which system index.
* iwconfig: Displays the basic wireless extensions for each interface, such as the current Mode (default is usually "Managed"), Tx-Power (typically 20 dBm), and whether it is associated with an Access Point.
#### 3. Disable Simulated Interfaces
```
rmmod mac80211_hwsim
```
The guide warns that you should not run `rmmod mac80211_hwsim` while working, as this will immediately delete all simulated interfaces and kill your active lab session.
### Advanced Wireless interface Settings
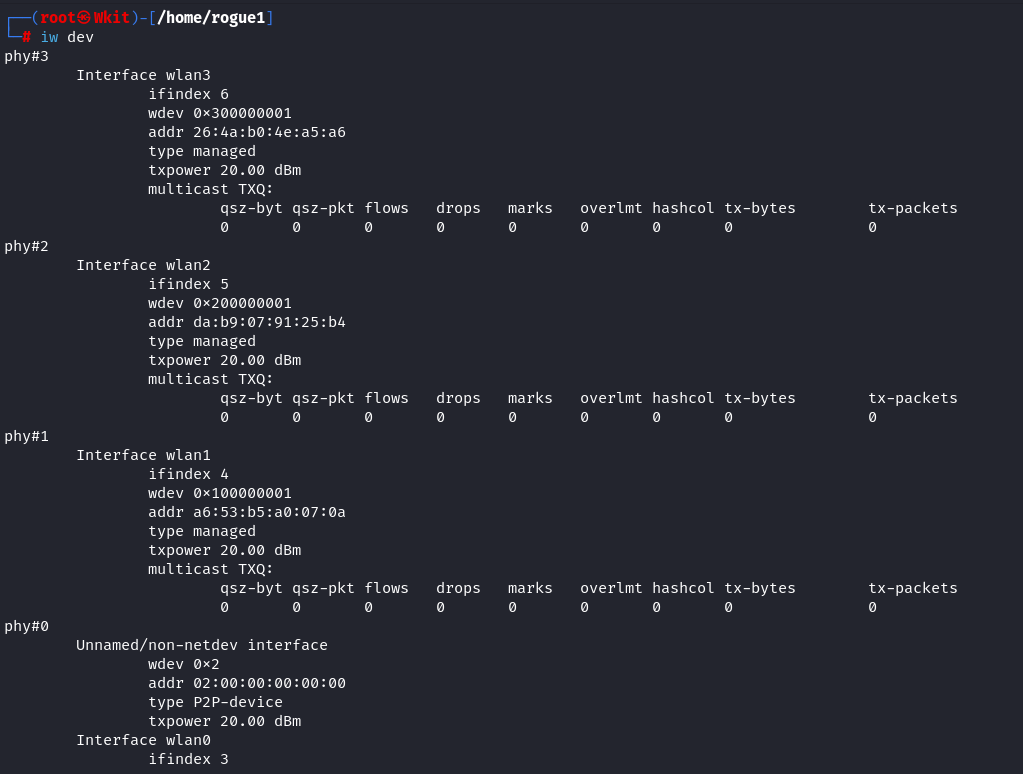
* iw dev: This is crucial for advanced tasks as it provides the `phy#` (physical layer index) and the `addr` (MAC address) for each interface.
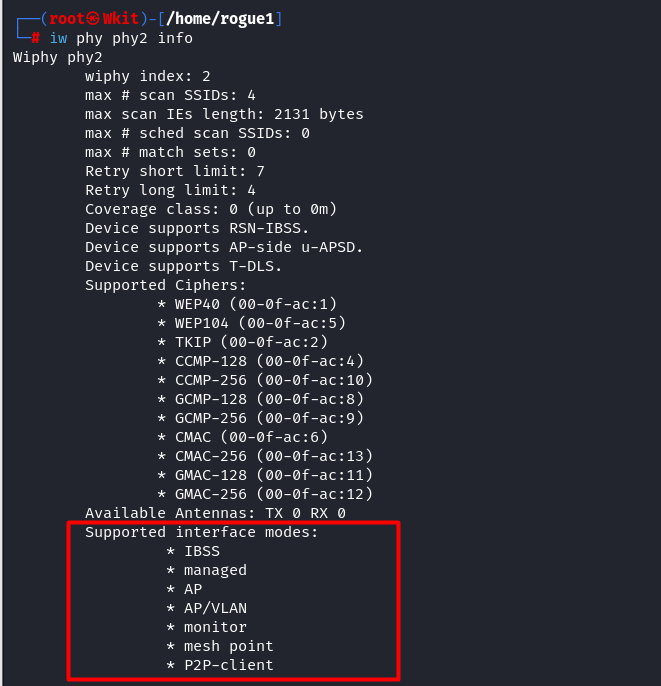
* Supported Modes: By running `iw phy phy2 info` (replacing 2 with your actual phy number), you can see that these virtual radios support almost all modes required for hacking: IBSS, managed, AP, monitor, and mesh point.
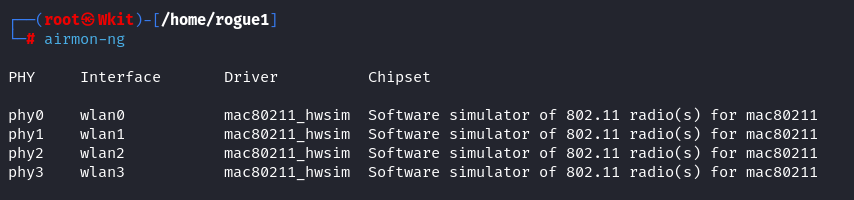
* airmon-ng: This tool from the Aircrack-ng suite lists the PHY, Interface, Driver, and Chipset. For these virtual radios, the driver will always be listed as `mac80211_hwsim` and the chipset as a "Software simulator".
#### Inspecting Driver Capabilities
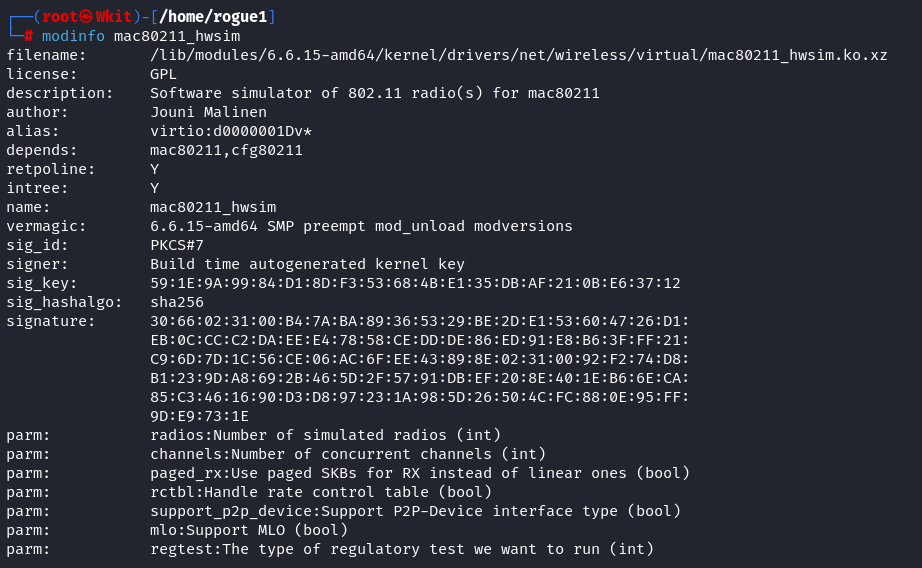
You can use `modinfo` to see the metadata of the simulator driver.
* Filename: The driver is located at `/lib/modules/[kernel-version]/kernel/drivers/net/wireless/virtual/mac80211_hwsim.ko.zst`.
* Author: The module was authored by Jouni Malinen, a key developer in the Linux wireless subsystem.
```
modinfo mac80211_hwsim
```
#### Regulatory Domain and Power
Before starting a lab, you might need to adjust the regulatory domain to ensure all frequencies (like 5GHz or 6GHz) are available for scanning.
Before making any changes, you should verify the current state of your system.
```
iw reg get
```
* Default Output: You will likely see `country 00: DFS-UNSET`. In this state, the system often defaults to the most restrictive settings, which can include `PASSIVE-SCAN` flags that prevent your card from actively probing for networks.
#### Changing the Regulatory Domain
To unlock broader frequency ranges and higher transmit power (Tx-Power), you can manually set the domain to a specific country.
```
iw reg set US
```
* Effect: Setting this to `US` changes the domain to `DFS-FCC`.
* Impact on Power: You will notice that the allowed transmit power for many frequency bands increases. For example, the 2.4GHz range (2400–2472 MHz) often jumps to a limit of 30 dBm.
* Impact on Frequencies: This change also enables or modifies access to 5GHz and 6GHz bands, which is essential for scanning modern access points.
{% embed url="" %}